Wednesday, September 27, 2006


Step 16
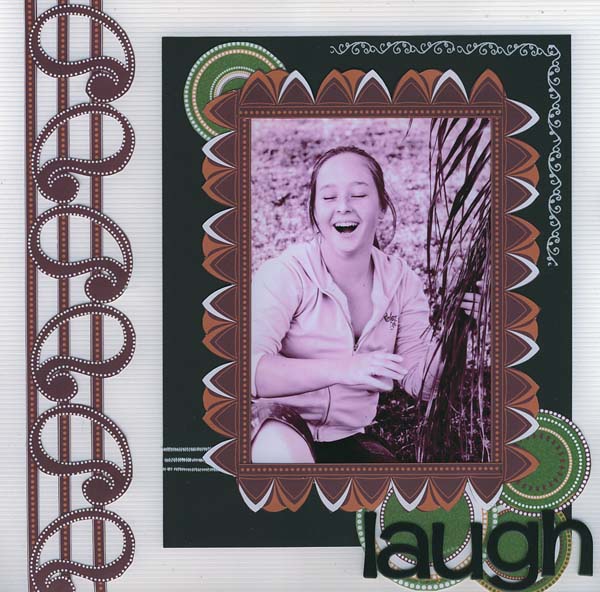
Now its time for the finishing touches.
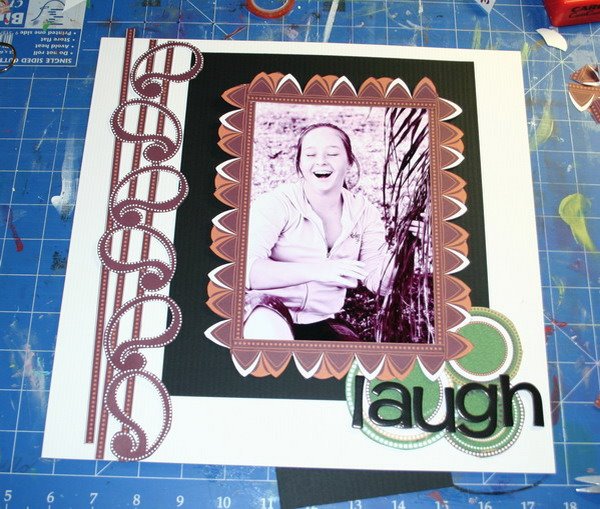
Take the rubbons and cut the strips As show in the image … the two flourish type rubbons go on the top right corner of the photo, on the black cardstock
The smaller stitches Rubons I cut into three pieces and placed them on the bottom left side of the photo. There is another small zig zag stitch rubon in the pack if you don’t have enough the make the distance between the edge of the black and the opera house strip.

Your title goes over the circles in the bottom right corner .. I used Scenic route chipboard alphas but you can use other Chippies, stickers or you could hand cut a title.


And there you have it a Cut it up cherry arte LO

Step 14


Step 14
Now we will place three strips down the left side of the Layout .. place them on the white section on the left , and move them till you have even placement that you are happy with. Then adhere them

Step 15
Place the Paisleys over the three strips of pp down the left side. Here it is important to play with placement before you stick. You need to get he paisleys on the right angle so they fit onto the page perfectly. When youa re happy with the placement adhere them

Step 12 & 13

Step 12
Place three of your circles in the bottom right corner of the Photo, under the frame. And again when your happy with the placement adhere them.

Step 13
Place the final circle under the top left corner of the Photo. And adhere.

Step 11


Step 11 place you strips of Opera houses along the edges of the photo and when you have them in a placement you like . trim the ends off. Adhere the pieces to the edge of the photo, but only adhere along the straight edge of the opera house strips.


Note: I photographed this part on a white background for easier veiwing

Step 9 & 10

Step 9
Adhere the black cardstock onto the white cardstock in the top right corner ¾ of an inch from the right side and ¾ inch from the top side .

Step 10
Adhere your photo in the center of that Black cardstock.

Step 8
Time to put this Layout together ..we should have all the pieces we need now.
Step 7
Take a piece of Black cardstock and cut it to 10 inches by 8 inches.

Step 6


Step 6
Take the Green PP and cut out 4 different sized Circles, Doesn’t matter if they are not fully round, you can hide a small edge under the Frame Later.

Step 5


Step 5
Take the Paisley strip with the white dots , and cut around the center of the each of paisleys on the edge of the dots. then cut around the outside edge of each paisley.
I recommend cutting the centers out first, as cutting the centers out of a smaller piece of paper can cause the paper to crumple a bit.

Step 4


Step four. Now we are going to put the white bordered strips aside and work on the opera house strips. Just simply cut out the triangle pieces to leave the opera houses on the brown bordered dotty strip. Just like in Image 3 Repeat this for all the opera house strips

Step three
Put the Paisley strips to the side. We are going to work on the opera house strips …. You will notice that on one side of the opera houses the dotted border has a white border and the other a brown border … for this step we are going to cut off the white strip. Repeat this on all four opera house strips. You can see this in the image below.

Step two
Take the sheet of cherry arte and we are going to cut the four sections highlighted in Image 1 below.. cutting along side the white or brown Lines to leave them in the cut out section. When finished this step, you should have 7 strips of paper. The two brown end bits can be discarded.

Tuesday, September 26, 2006


Ok welcome to my online cut it up class .. There are thousands of patterned papers out there on the market place, and in this class I hope to change the way you look at a sheet of paper.
I use a craft knife and a metal ruler for my straight lines and Just the Craft knife for freehand cutting.


The first step
If you have one available change the blade in your cutting knife.